Stafford MOW will need to regularly update the items available to be ordered in a menu.
This process takes a few stages to complete, but is relatively simple to do.
The stages to complete are:
Clear the old weeks items | Allocating menu items | Create & add new menu items
Clear the old weeks items
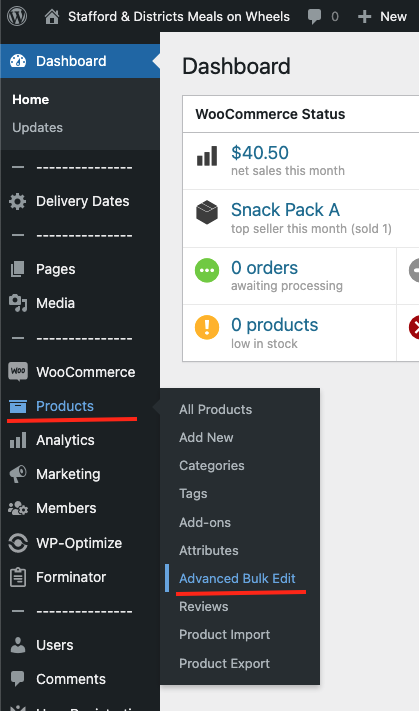
Go to the WordPress admin area, and go to Products, then select “Advanced Bulk Edit“.
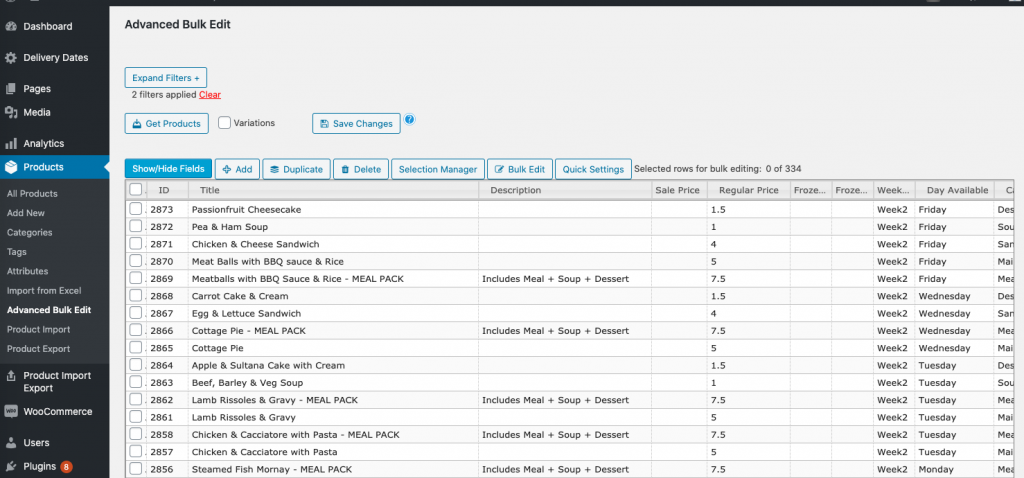
When the Advanced Bulk Edit page opens, press the “Get products” button at the top of the page, in order to get all the current menu items to appear.
You can resort the items in the list by pressing the text at the top of each column, at any time.
In order to begin adding the menu items for the week you need to complete, you need to initially press the “Selection Manager” button at the top of the list. Tick the box for the “Where week available is” and then select the week you want to work with.
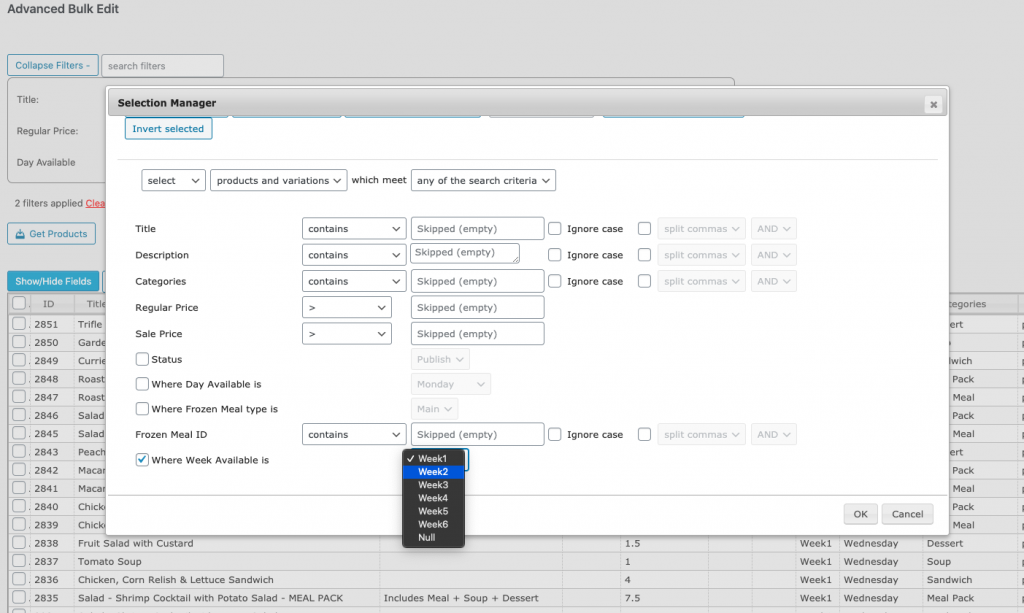
Press OK to then have all the items for that week selected & highlighted in yellow.
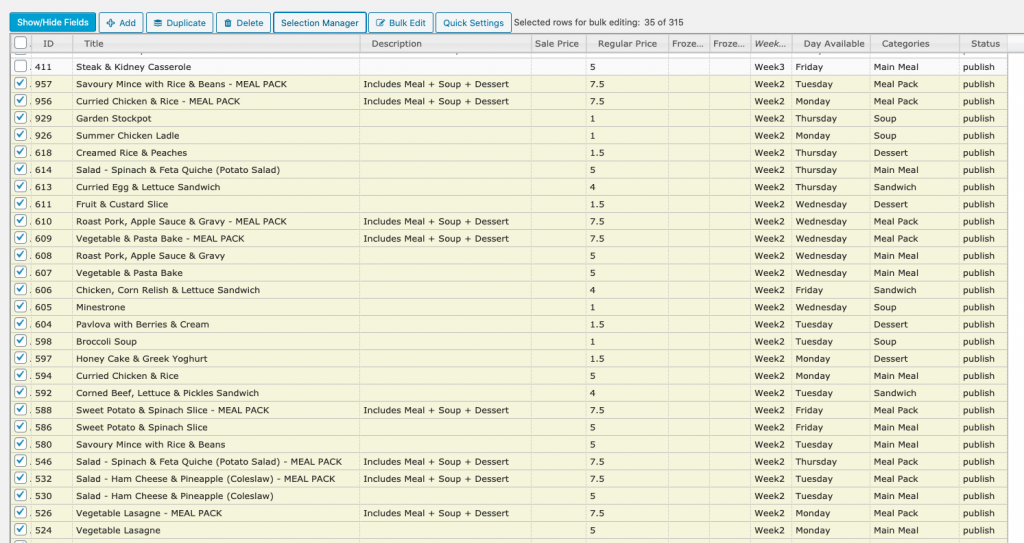
Now press the “Bulk Edit” button at the top of the list.
In the options that appear, tick the “Set Week Available” item and choose “Null”.
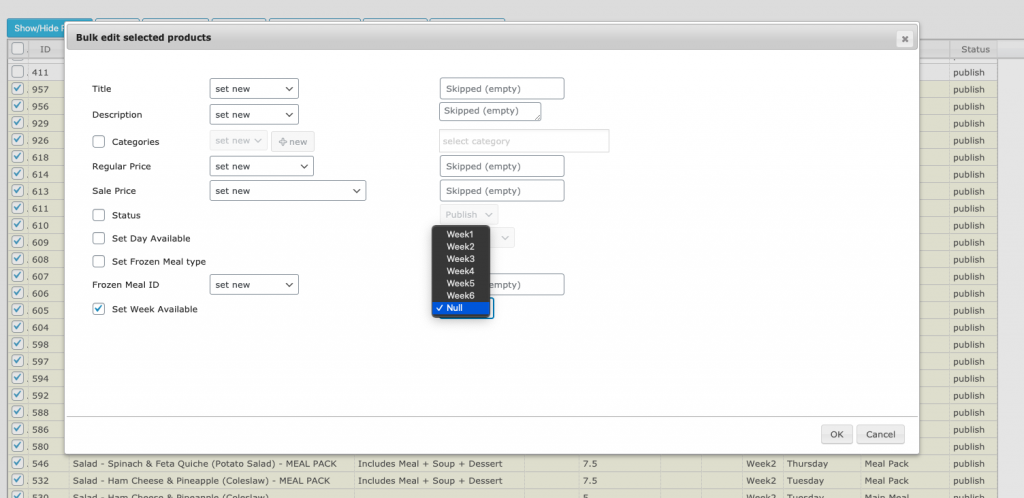
Press OK. This will then change the all of the selected item to have their Week vale set to “Null”.
Any items set to Null will not appear in the website as order-able items, so that page will now have nothing available on it in the public view, for that week.
Press the “Save Changes” button at the top of the page, to keep the work you have done so far.
Allocating menu items
You menu will need items added to it, which already exist in the list.
If you need a meal that is not already in the list, you will need to create & add it, via the steps shown below.
To add existing menu items, you need to first find the item in the list. Sorting the list by the ‘Title’ column can make this easier.
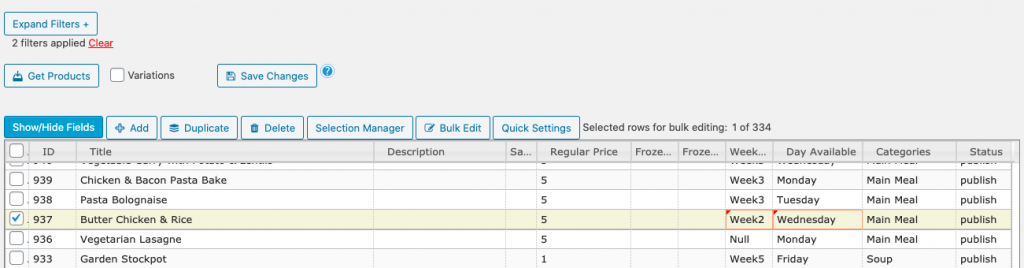
- Tick the item & then click on “null” in the week column. Choose the correct week from the list.
- Then, click on the day in the “Day Available” column and select the right day, if necessary.
You will not need to edit any other items in the row.
Continue this process for each of the items you need to add to the menu for the week.
Once you have finished, press the “Save Changes” button at the top of the list.
NOTES:
- When allocating Main Meals, you need to add the Main Meal, as well as adding the same item as a Meal Pack.
- Do not edit any items marked with a category of “Frozen”
Create & Add new menu items
If you find that you need a meal that is not already in the list, you will need to create & add it. This is fairly simple to do.
The steps below show you how to duplicate an existing item in the list, to help you to complete the new item faster.
First, select any existing item in the list that is in the same meal category as the new item you want to create.
Go to the “Duplicate” button at the top and then press the “Duplicate” button again, in the dropdown that appears.
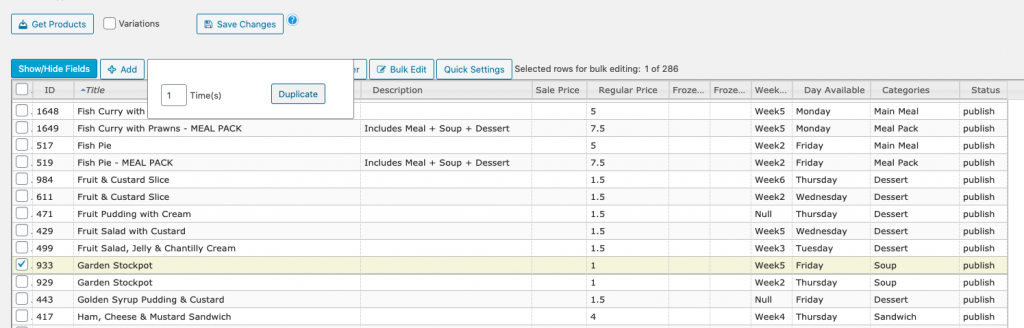
A duplicate of the item will be placed at the top of the list, highlighted in green.

The new item should have the following fields updated in order, from right to left;
- Change the status from “draft” to “publish”
- Update the “Day Available” if needed.
- Update the “Week” if needed
- Update the “Title”. Make sure you remove the text “(Copy)” from the title when editing it.
- Untick the box in the first column.
You will not need to edit any other items in the row.
Continue this process for each of the items you need to add to the menu for the week.
Once you have finished, press the “Save Changes” button at the top of the list.